|
Filling diaphragm seal methods Most of the following text you can find in the ANSI-ASME B40.2 In general there are three ways to fill a diaphragm seal. 1. Filling a diaphragm seal after assembly of the seal to the
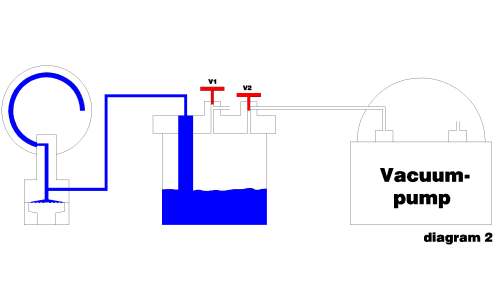
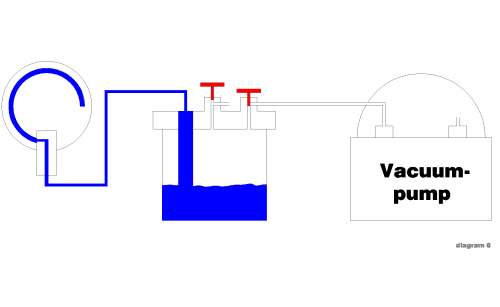
instrument 1. Filling a diaphragm seal after assembly of the seal with the instrument 1.1 filling process After you have attached the diaphragm seal to the instrument, leak test all the joints (possible leaking points). Connect the fill/bleed port to the manifold of the filling system. See diagram 1.
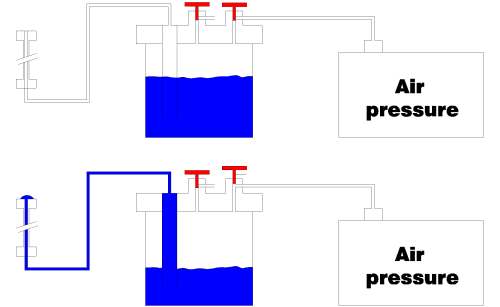
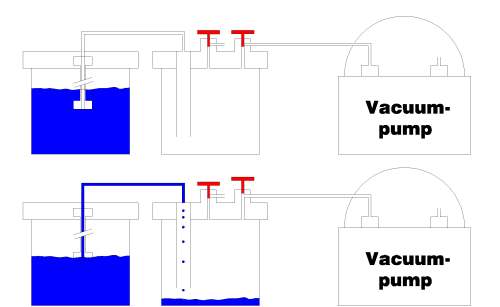
Here you see a system where V1 is a valve, which makes the system atmospheric and V2 is a valve connected to a vacuum pump. When you turn on the vacuum pump, close V1 and open V2, allowing all
air within the system to be evacuated. Once all air bubble percolation has
ceased, close V2 and open V1. The filling fluid will take the place of the
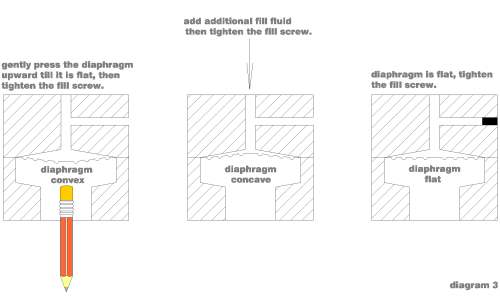
space that is airless. See diagram 2. 1.2 Checking the deflection of the diaphragm After filling, before tightening the fill/bleed screw, the deflection
of the diaphragm should be checked. If the diaphragm is not flat,
excessive non-linearity and/or temperature error may result. Special procedures may be required to fill diaphragm seals with
elastomeric or teflon diaphragms because the diaphragm may be excessively
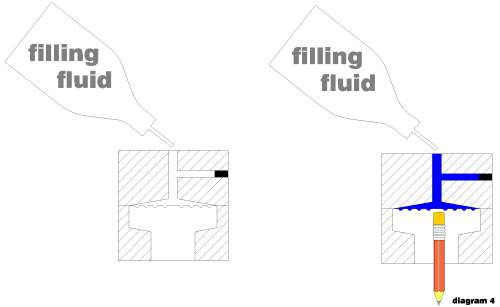
distorted by the application of vacuum. 2. Filling a diaphragm seal before assembly of the seal to the instrument There are three steps you have to take to fill a diaphragm seal before assembly to the instrument: - Filling the diaphragm seal 2.1 Filling the diaphragm sealA diaphragm seal can be filled using an oil can. The diaphragm should
be flexed gently using a finger or a pencil eraser on the process side to
purge entrapped air. 2.2 Filling the instrument Filling an instrument is done in the same way as the situation where
the instrument and diaphragm seal are already assembled. 2.3 Assembling the filled seal to the filled instrument After filling both the seal and the instrument, the connection of the
instrument should be quickly inserted into the instrument connection on
the seal. Before you begin to tighten the assembly, slightly open the
fill/bleed screw so that excess fluid can be allowed to escape. Once
assembled make sure to tighten the bleed screw. The diaphragm flatness must be checked in the same manner as described in paragraph 1.2 If the seal does not contain a fill/bleed screw, the connection between
the instrument and the seal must be left slightly loosened until the
diaphragm flatness has been achieved, and then the connection may be
carefully tightened. 3. Filling a diaphragm seal with a capillary between the seal and the instrument These assemblies can be filled as a unit using the procedures described in paragraph 1 If filled before assembly, first the seal and instrument should be filled as described in paragraphs. 2.1 and 2.2, then the capillary. You can fill the capillary by pressurizing the fill fluid into one end, allowing flow until no bubbles appear at the other end, or applying vacuum to one end of the capillary and immerse the other end into a container of fill fluid, continuing the process until all air is removed.
The filled capillary is then assembled to the instrument and seal in the same manner as the seal and instrument assembly in paragraph 2.3 |